
5 creative ways to showcase your photography at home
When was the last time you printed your own photographs?
Whether you are a flower photographer, you love landscape photography or maybe you enjoy taking photographs of your children, your pictures deserve to be seen, not locked away! And coming up with creative ways to showcase your photos needn’t be a chore. Read on as we share five creative ways and our top tips to inspire you to get printing and display your pictures at home.
TIP # 1 CREATE A ‘MAGAZINE SPREAD WORTHY’ GALLERY WALL!
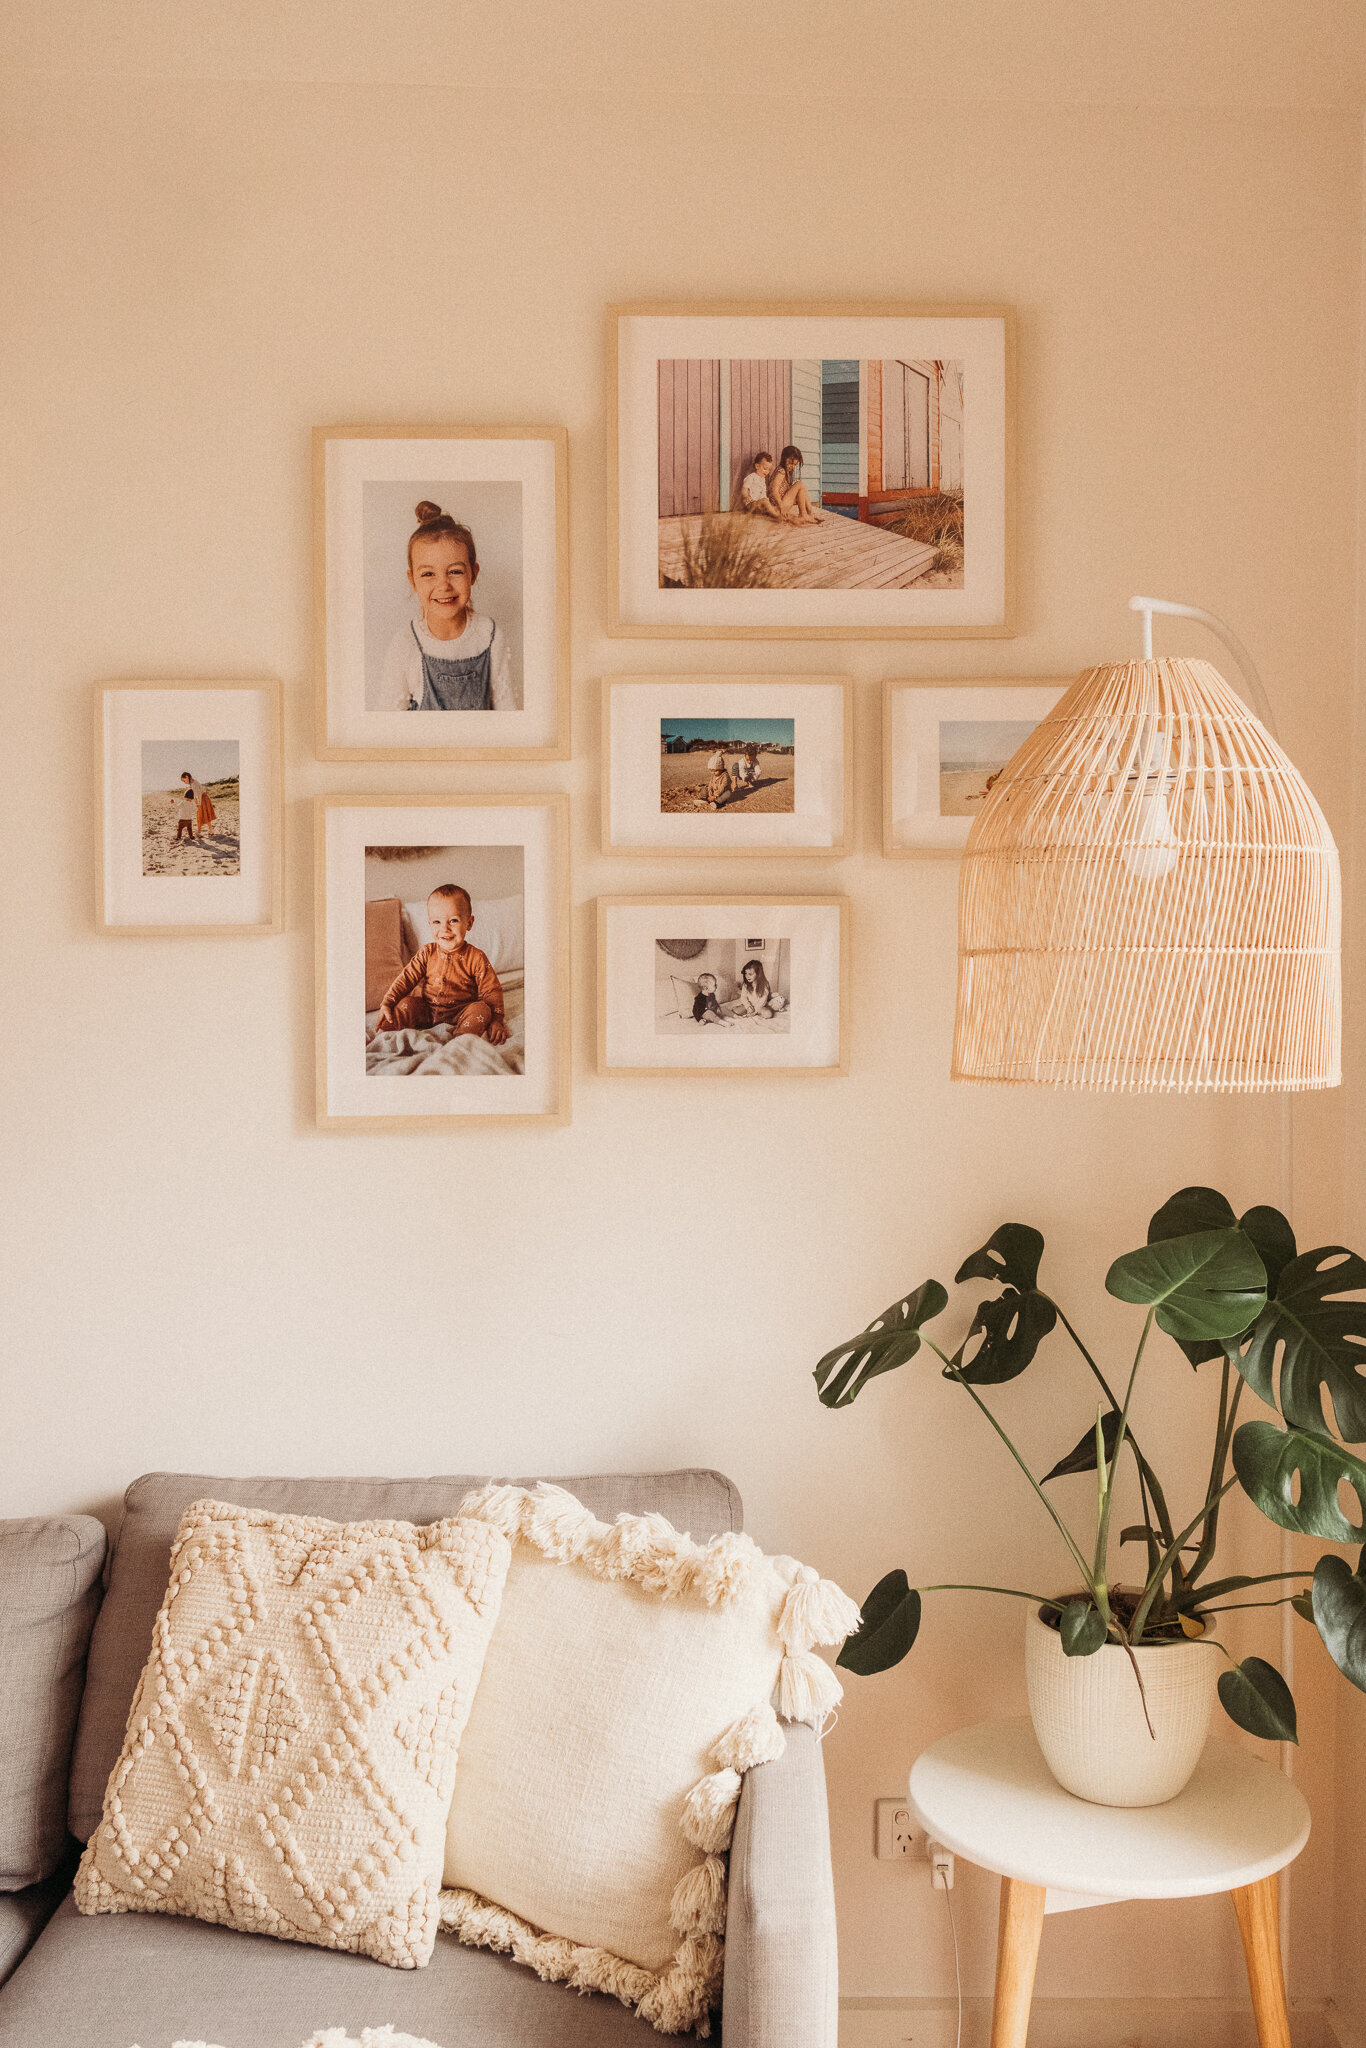
Follow the lead of Merissa Wakefield and match the styling of your frames to your home decor.
Step 1. Do your research
Use an app like Pinterest to search for inspiration. As you pin your favorite images you’ll start to see the style and type of gallery wall you want emerge
Step 2. Decide on type of gallery wall
There are lots of different ways to put together a gallery wall. Do you want matching or mismatching frames, colours and sizes? Both look amazing and there is no wrong way. Consider the style of your house and the types of images you want to display. A mix of photography styles and art look great in an eclectic home with a mix of different colored frames and textures. My home is minimalist and coastal so I went with the same frames in different sizes.
Step 3. Setting up the gallery wall
Once you know style of your gallery wall, you need to decide the size and number of frames and how you want them displayed. Think about where you are putting them and the size of the wall. I went with a mixture of frames, one bigger frame, two medium frames and four smaller frames, positioned in both landscape and portrait. I found the inspiration for this layout on Pinterest.
Step 4. Choose your frames and images
You might have a collection of your favourite images or art already earmarked for your gallery wall, or you could be starting from scratch like I was. I wanted to include images of my children playing, plus my favourite portrait of each of them. I used the print module in Lightroom and set up the gallery wall layout virtually (you could also use Canva). Then I dragged and dropped images in to the layout. When I was happy with the combination of images I sent them off to my favourite print lab. I choose frames from IKEA for my gallery wall. They’re inexpensive, come in a huge variety of sizes and I can change the images down the track.
Step 5. Put them on the wall
This is the trickiest part! I started with the two middle frames and worked out from there. Because the IKEA frames are relatively light I used the adhesive hangers from IKEA so I didn’t put lots of holes in the walls. I’m sure there is a more scientific way to put them up, but I just used a gray led pencil and tried my best to line them up! Good luck with this step!
“And there you have it! 5 steps to the perfect gallery wall.”

To get perfectly aligned frames, you could also opt for a laser level, available from hardware stores. Image courtesy of Merissa Wakefield Photography.
TIP #2 DITCH THE FRAMES AND GO FOR RAW PRINTS IN A RUSTIC BOWL

Keep some prints on hand in a beautiful timber display bowl, as Camilla French does.

These unframed, square prints have a perfect laid back feel. Image courtesy of Camilla French.
“We have a bowl on our TV cabinet filled with 4x4 prints. The photos are precious but the prints are not, they are there to be loved and looked at, to be handled often.
Need a bookmark? Grab a print.
Need something for a craft project? Grab a print.
Need to mail something to Grandma? Grab a print.
We add to it, we take from it. The quality isn’t the best but interaction and enjoyment is. ”
This option is inexpensive, is a great way to keep your photos accessible to the entire family, and you can add to them or switch them out with minimal effort.
TIP # 3 STYLE UP A WALL WITH RUSTIC FLOATING SHELVES
Our friends over at Willow Layne Co handmake these farmhouse styled floating timber shelves which allow you to place frames (and other decor) where you want. Its a great option if you like to switch our your artwork frequently and the rustic wood is full of character and charm!
“These rustic shelves were meticulously designed to save space and to create an eye catching display for your home. Not only stunning but extremely functional! Create the gallery wall you’ve always dreamed of that will have your guests talking!”
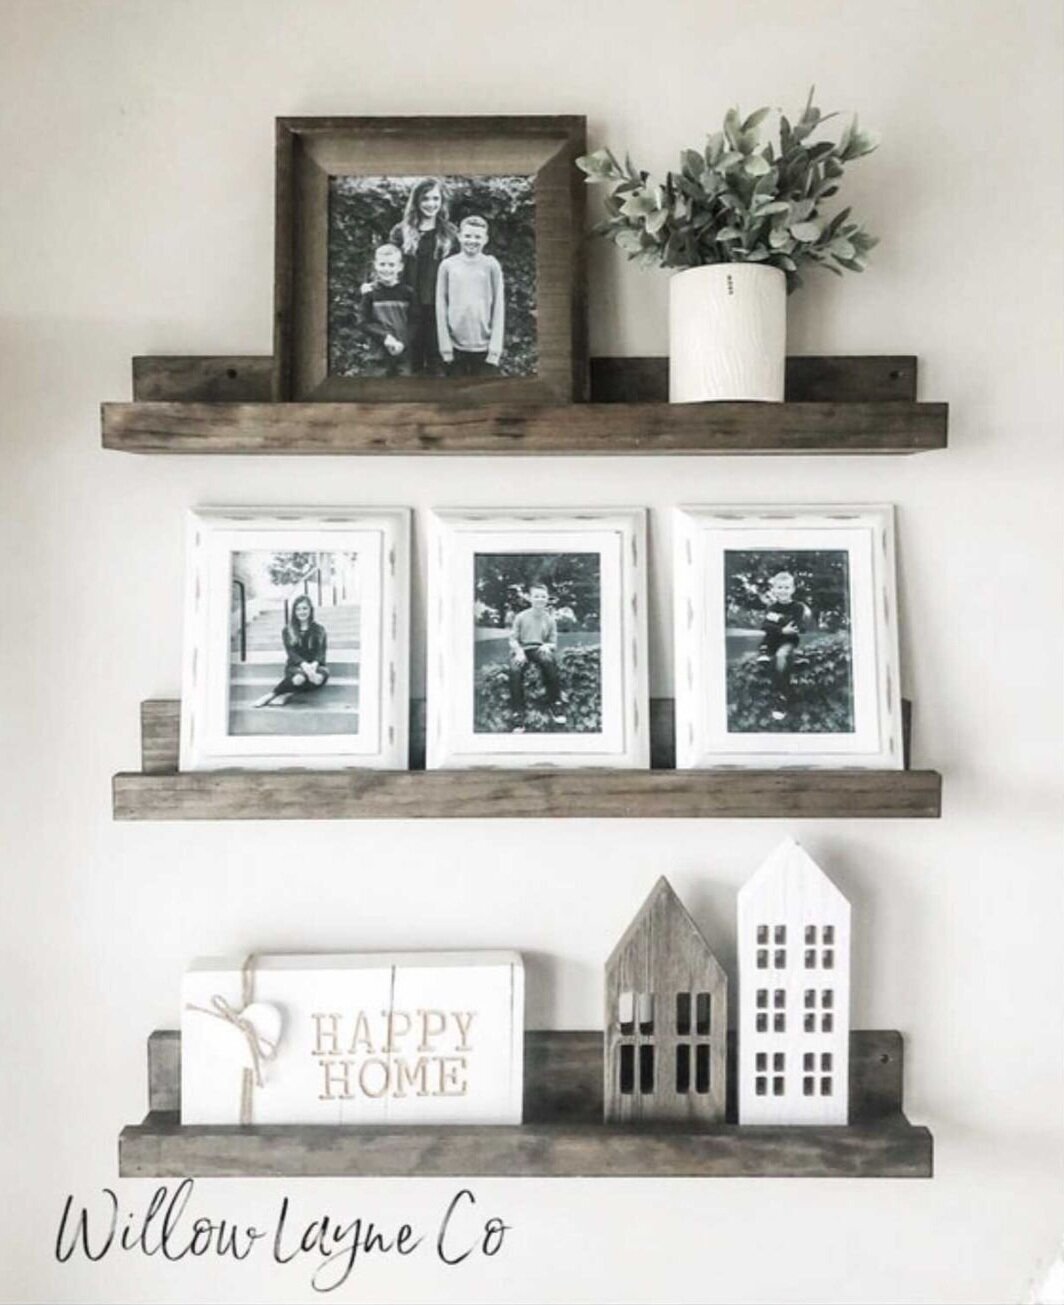
Rustic timber floating shelves handcrafted by Willow Layne Co

TIP #4 CONSIDER OUT OF THE BOX FRAMING OPTIONS

Photographer Jess Worrall suggests these alternative framing options for their versatility.
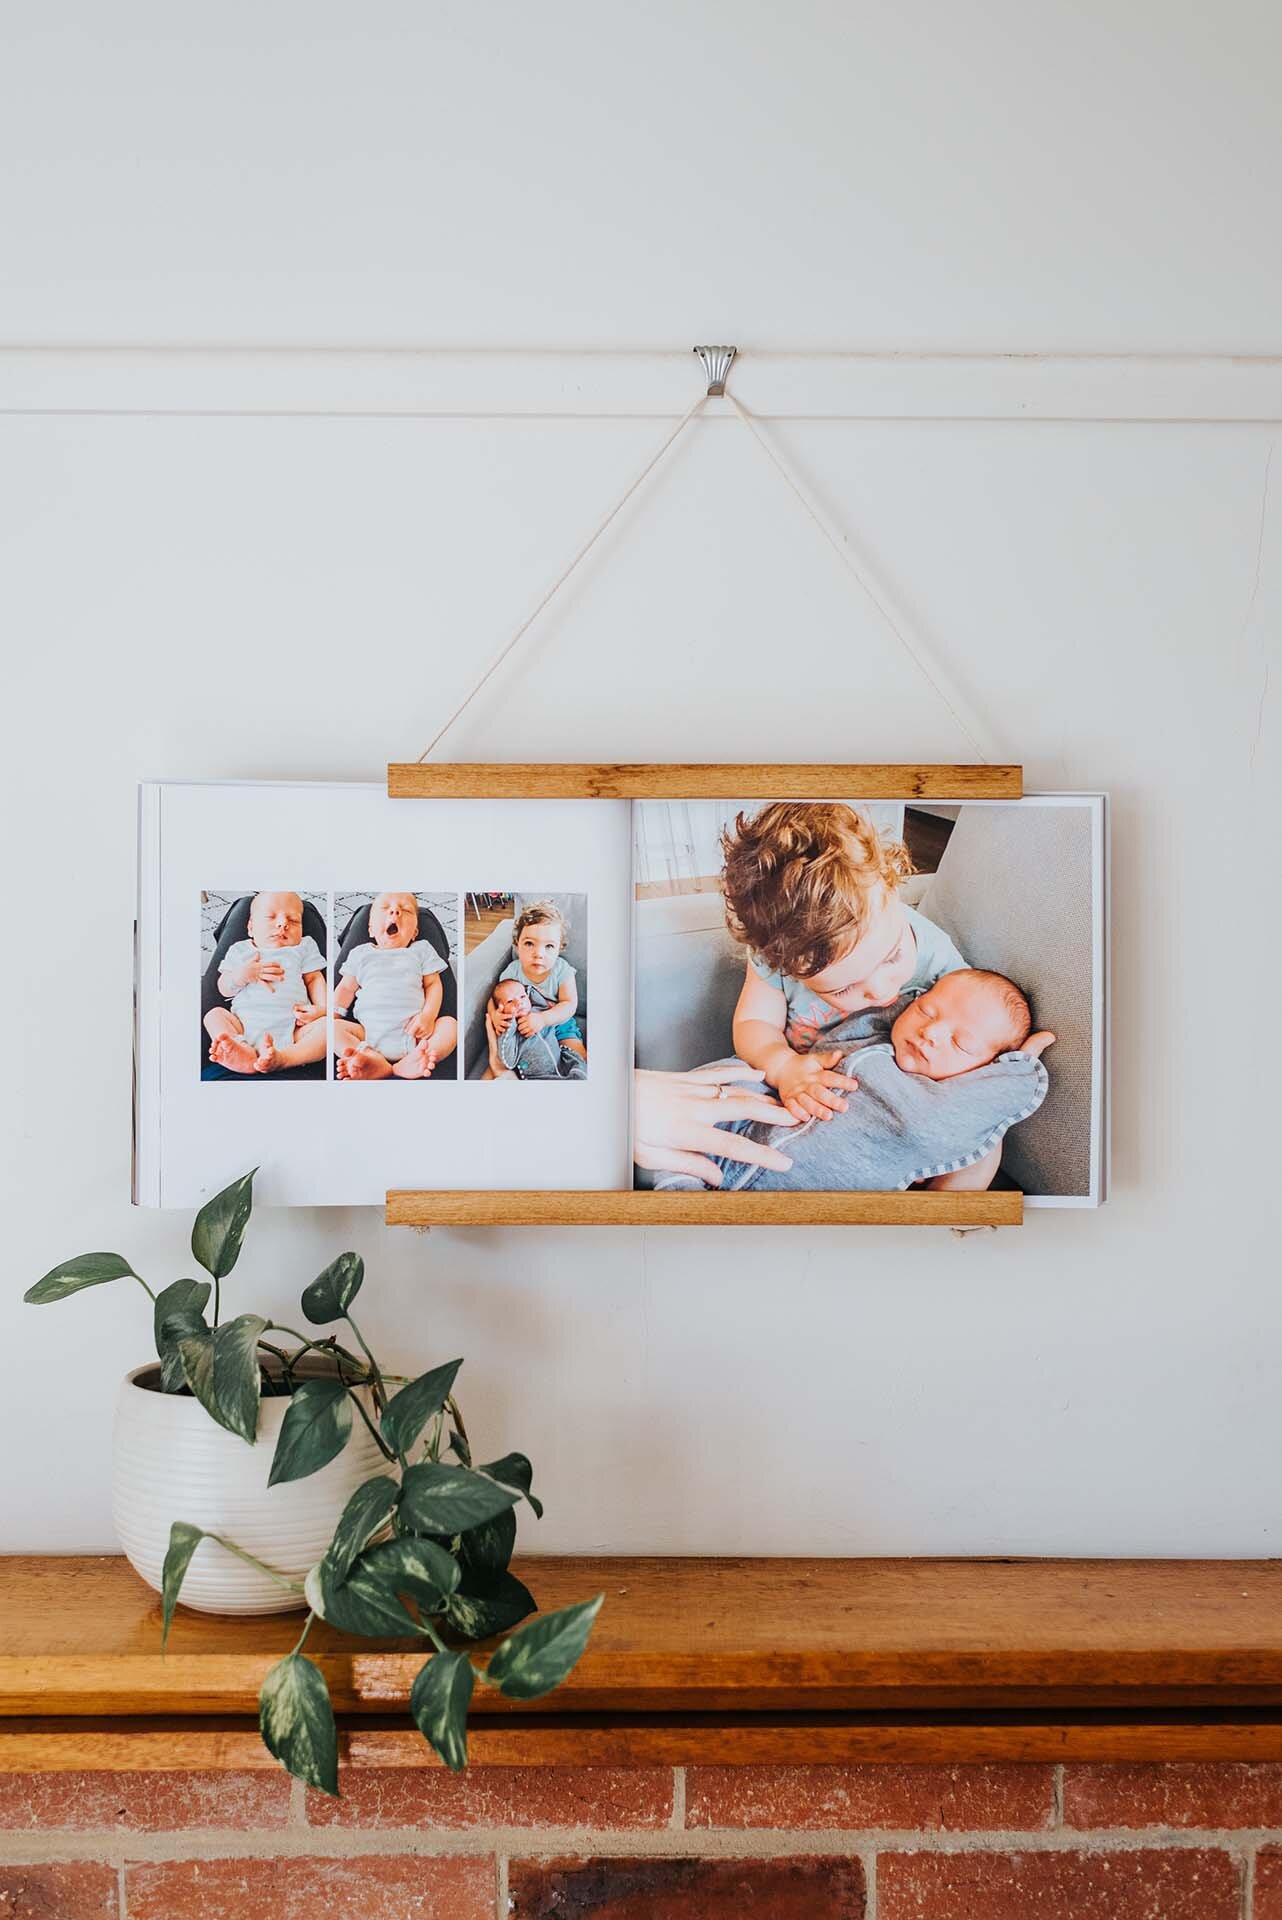
Image courtesy of Jess Worrall
If you’re struggling to choose WHICH photo to print & frame – is to consider a framing option like this one! These timber frames from Corner block Studio make it super easy to swap around photos more frequently – so instead of choosing just a couple of photos to print, you can print a selection and then just swap them around whenever you like. I actually upcycled my old photo calendar and used them in the frames – a great way to get a bit more bang for your buck with your next photo calendar. Another frame I love from cornerblock studio is this book frame. So you can actually display your photo albums – how unique and special is that?!

Beautifully framed print and album, image courtesy of Jess Worrall Photography
“My biggest tip for displaying your photos!? Don’t overthink it!! It’s really easy to feel overwhelmed when trying to work out what photos you’re going to print / where you’re going to hang them / what size / what colour frame etc etc. I think quite often it gets to a point where people become so overwhelmed with all these choices they end up making NO choice at all and so their walls remain bare.”
BONUS TIPS!
GO FOR QUALITY OVER QUANTITY

Image courtesy of Jess Worrall Photography
“If you only take ONE THING away from this post, let it be this - if you’re printing photos to have framed & on display and to look at every single day, you are going to be SO much happier with the final result if you pay a little bit extra to get them printed at proper lab! Kmart and Officeworks (shudders) and all the super cheap places, are cheap for a reason…. You want to choose QUALITY over price for this step!!”
RESEARCH WHAT YOU LIKE AND WHAT YOU DO NOT LIKE!

“Pinterest is your BEST FRIEND when it comes to getting inspiration and trying to work out what mix of different photo types you like – and more importantly, what you DON’T like! First off, you need to decide on what wall you’re going to use, so you can plan for the space you are going to work with. Then, jump on pinterest, work out what gallery layouts you like and go from there.”
CONTRIBUTORS
Jess Worrall Photography https://www.jessworrall.com/
Camilla French Photography https://www.camillafrench.com.au/
Merissa Wakefield Photography https://www.merissawakefield.com/
Willow Layne Co Decor Willow Layne Co on Etsy